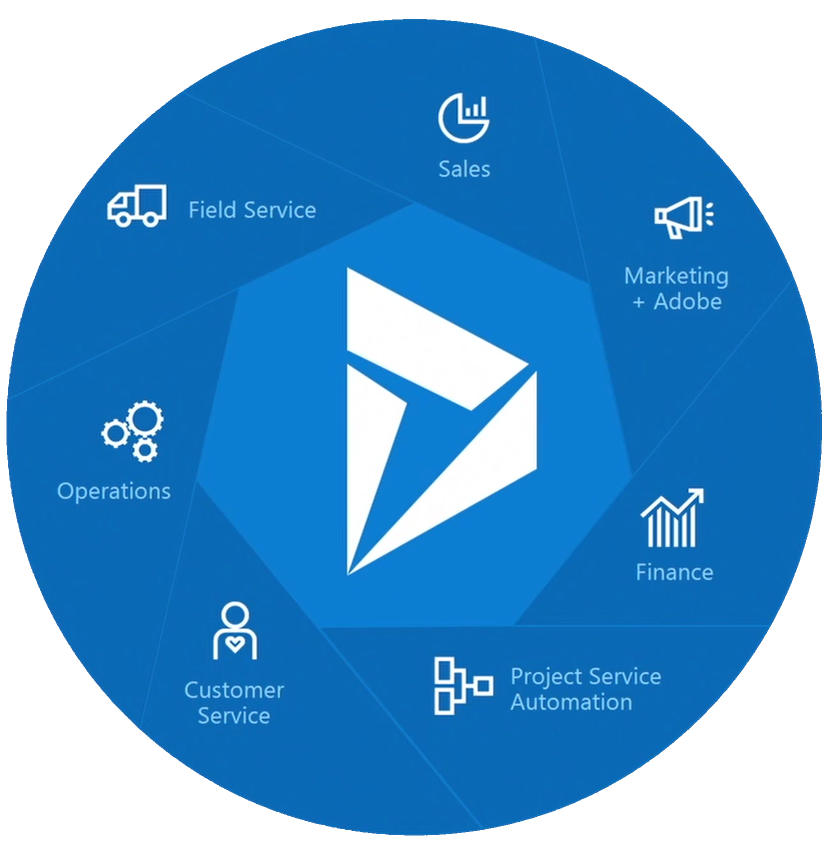
Microsoft Dynamics 365 Integration
The following is a deep-dive into a project we worked on in the past that required integrating Microsoft Dynamics and a 3rd party SaaS tool. For this project, we had a source system made up of a relational source database in MSSQL, sitting behind Microsoft Dynamics 365 and a destination system composed of a web application with a supporting database on MongoDB. The source database has a feature called “CDC”, or Change Data Capture that can be configured to track changes at the table level. In our use case, these changes needed to be captured at the MongoDB side as they happen in the SQL database. Our pipeline was designed to use an event driven architecture, using RabbitMQ as our message broker. The destination components included a consumer service subscribed to our broker’s topic, and a MongoDB cluster as the destination database where the data changes are capture. The components of the pipeline include Azure Functions, Logic Apps, and blob storage as the middleware.
To mirror the development process, this study will be broken into different sections, each one focused on a different layer or stack of our architecture. We will start with the source system and database (Microsoft Dynamics & MSSQL), followed by the middleware (Azure Logic Apps & Azure functions) and finally, the destination system (message broker, consumer service, and MongoDB database).
The sections are as follows:
References
Part of the design and development process always involves a bit of research, and I wanted to both credit the sources of information that helped us during our research and also provide other resources for anyone who will be taking on projects similar to ours.
Here are some of the sources we used during our research:
https://docs.microsoft.com/en-us/dynamics365/fin-ops-core/fin-ops/
https://docs.microsoft.com/en-us/dynamics365/fin-ops-core/dev-itpro/data-entities/data-entities
https://blog.crgroup.com/dynamics-365-latest-feature-the-data-export-service/
https://www.encorebusiness.com/blog/logic-apps-in-dynamics-365-fo-file-based-data-integrations/
https://medium.com/hitachisolutions-braintrust/logic-app-integration-with-d365-f-o-524ac4909f0
https://azureintegrations.com/2019/10/15/d365fo-interacting-with-data-management-frame-work-using-rest-api-for-delta-changes-on-entity/
https://github.com/Microsoft/Dynamics-AX-Integration/wiki/File-based-integration-using-Logic-Apps
The Source
For this project, our data source was the Microsoft Dynamics 365 Finance & Operations web application sitting on top of a SQL database. An important characteristic of this source is that it is a relational database, as opposed to the destination database, which is a document based database.
Relational Databases
Relational databases tend to be the industry standard for most groups and organizations because to be frank, these databases have been in place longer than the other types and have the most support amongst vendors and enterprise clients. Most developers and database admins learn their trade using relational databases, and they are the de facto standard in the industry.
The key characteristics of these databases are as follows:
- Database is managed by RDBMS or “Relational Database Management System”
- Data is structured in rows and columns based on pre-defined relationships
- Data can be manipulated using SQL (Structured Query Language)
- Rows represent a collection or grouping of related values
- Columns represent a certain kind of data
- Rows almost always have a “primary key”, used as an unique identifier
- Popular relational databases include MSSQL, MySQL, Oracle, and PostgreSQL
Microsoft SQL Server
Now that we’ve covered the general idea of relational databases, we will go over some of the product specific traits of SQL Server. The first thing to note is that Microsoft SQL Server and the shorter “MSSQL” acronym are interchangeable in industry, so just remember that they are one and the same.
Microsoft’s SQL Server is one of the most popular enterprise databases and tends to come up quite a bit on client projects (including the one that inspired this post). In the past, Microsoft wasn’t exactly “open source” friendly and using their product would have required purchasing a license key and going through the process of setting up the system as a customer. Thankfully, they have taken different attitudes in recent years and expanded their offerings to allow for easier deployments and no upfront costs for use. Due to this, if you’re following this project and don’t have access to a client’s MSSQL, you can launch an non-production MSSQL database using Docker.
Microsoft Dynamics 365 Finance & Operations
Originally known as Microsoft Dynamics AX, this system is focused on medium and large organizations and enterprise resource planning. Within the Dynamics ecosystem, the data that we are interested in is expressed as “Data Entities” which are essentially custom views composed of fields from the base tables. The purpose of “Data Entities” is to abstract the data from the base tables to business specific terms for non-technical users (an example could be an “Employees” entity, which could bring in fields from 4 different base tables that store information relevant to employees). For our project, the data entities that needed to be transferred from source to destination came from what is referred to as “Export Jobs”. These export jobs are created using the web interface, which provides both a layer of convenience and safety since the data does not have to be directly pulled from the database. This interface meant that we did not need to create custom queries or stored procedures to get the data out. I’ve included some images below to demonstrate the features I’m talking about:
Ignore the red box, we’re interested in the Export button
The Add Entity button allows us to configure each job with the data we are interested in
Setting Up the Source Components
From a technical perspective, this source system requires the least amount of work. To set up the rest of the pipeline, we simply created “Export Jobs” for all the data entities we were interested in transferring to our destination system by adding the entities to the jobs on the configuration screen. In our particular case, we configured the jobs to export the data as CSV file extracts, but it is possible to export the data as Excel extracts or other file/data types. The key requirement for our project was that we weren’t interested in exporting all the data every time, we were interested in only the data that had changed (“Change Data Capture”). To make sure we were only transferring this specific data, we made sure to enable change data tracking on every entity we were interested in. Once this was enabled, only data that changed would be exported after the first initial data dump. You can do this using the web interface, in the Entities module.
To be clear, you should enable CDC for each entity before creating the Export Job
Source System Conclusion
Reading this section, you might be struck by the simplicity in this stage of our pipeline. Due to the abstraction that is provided by the Dynamics web application, we were saved from having to directly interact with the underlying database. To summarize what we did here, we simply enabled change tracking on the entities we are interested in transferring and then created the corresponding export jobs. In the next post, we’ll explore how we tie these export jobs into the rest of the pipeline and our event driven design using a couple different Azure services.
The “Middleware”
In the previous section, I went over the source systems including Microsoft Dynamics and the database that sits under it. Due to it being 2021 and the cloud eating the world, the source systems were deployed on the Azure cloud and as such were easily configured to interact with certain services that we designed to transfer the data from the source to the message queue. Specifically, these services were Azure Logic Apps, Azure functions, and finally blob storage.
Azure Logic Apps
The Azure Logic Application service is offered on the Azure cloud and its billed as a “Integration Platform as a Service”, or in slightly different terms, it is a workflow engine used to tie together different Azure services. Some of the pros include the fact that it’s a visual interface (think “no-code”) and the sheer ease of combining a variety of Azure’s cloud services. It is analogous to the Step Functions on AWS.
The purpose of the workflow that we developed on our logic application at a high level is to automatically run the export jobs on the Dynamics application and place the files generated from the jobs on Azure’s storage system. While it was not particularly difficult to create this workflow from a technical perspective as it is a no code solution, there were some tricks and quirks that we learned that are useful to share to the community.
Azure Logic Workflow
The first part of our particular process was to establish the cadence or scheduling of the logic app. The application offers several configuration options as far as scheduling goes, and for the sake of this guide, I’ll include a screenshot of what it looks like set to run every eight hours (see below):
The first part of our particular process was to establish the cadence or scheduling of the logic app. The application offers several configuration options as far as scheduling goes, and for the sake of this guide, I’ll include a screenshot of what it looks like set to run every eight hours (see below):
The step that follows encompass the bulk of activities, and is held within a isolated series of events, in a section called “Scope”. This self-contained block of logic within the scope called “Until” is the segment that runs the export job on Dynamics. This is illustrated below:
The breakdown of these steps is essentially saying until the value that is returned by the “Dynamics Export to Package” job is not that string of zeros (which represents completion or not), then the logic app should run the “Dynamics Export to Package” job. The fields that can be configured for the “Execute Action” substep include the Instance (which Microsoft Dynamics application is this workflow controlling), the Action (in our use case, we were exporting to a data package hence the action shown in the image), the Definition Group ID (the name of the export job running on Dynamics), whether it should re-execute on failure, and the Legal Entity ID.
Once the export job is run, the logic app will then return a value. This value will be used further in the workflow to run other steps. One important thing to note at this stage is that there may be a slight delay in the export job running and the logic app returning the value, so I added a five minute delay in the app following the Export to Package job to give the systems time to align (shown to the right).
At this point in the workflow, the logic app has triggered the job run and has stored the return value. This return value will be used to validate the next step in the workflow, since it represents the job’s execution ID.
Once the five minutes have passed, the next step of the workflow is set up to take the data files created by the jobs and place them into an Azure blob directory. The first part of this block of logic is a condition that is essentially asking “Is the execution ID that was declared in the beginning of the entire application the same as the value returned by Dynamics after the job was run?”
If this is False, then we configured the application to send an email notifying our support team that there was a failure in the process.
However if this is True (which means the job ran successfully), then there is another isolated block of logic that is responsible for getting the files and placing them in the Azure blob storage.
Within the block of logic that references the True condition, we added another sub-condition as control to the Dynamics operation that would gather the files produced by the earlier Export to Package job. This sub-condition is essentially asking if the Export to Package job succeeded.
If the job succeeds, then the logic app will execute the Dynamics action that gathers the URL of the data package (the result of the job Export job). This URL is used to place the data into Azure blob storage.
After getting the URL, the block of logic adds another sub-condition. This piece of conditional logic is to verify that the URL is https and thus, valid.
Drilling down into the True section of logic, the HTTP module of the logic
app is used to call a ‘GET’ method on the URL.
Extracting the single blob object (Azure detects it as an archive) to a new directory dumps the individual files into the path that you set.
The HTTP block then gets to create the blob that will store the files. However, here’s one of the quirks of the Azure environment. The files created as part of the Export to Package job are all stored as one blob, which means that they appear as one object on Azure’s storage service. This is quite limiting if you have a job that exports multiple entities and would like to save each entity’s data file as a separate object. The solution to this issue is to add another step after creating the blob to “extract” the files to stand alone blobs
The Azure Logic App service is quite powerful, and the fact that we could orchestrate an entire data extract process with no lines of code written is a testament to that capability. While there are some odd bits of knowledge needed to get this particular workflow set up, it speaks to the Azure ecosystem that we integrated so many parts of the puzzle so easily. The next section will deal with what the pipeline does with the files after they are dumped into the blob storage service.
Azure Functions
Microsoft’s Azure Functions are the cloud provider’s serverless compute service. For some brief context, most major cloud providers provide a “serverless” offering that allows users the highest level of granularity when it comes to computing. Essentially, serverless computing allows developers to run code without having to provision servers, configure a back-end or hosting solution, or managing runtime. Microsoft’s Azure functions provide this through an event-driven platform that allows for programming in a variety of languages (C#, Java, JavaScript, PowerShell, Python, TypeScript, Other/Go/Rust). This article will show code samples in Python, but we did also experiment with developing custom handlers for Go (our follow up to this guide could include those examples). Serverless code is only billed for the seconds or less of runtime of each function and can be a economically efficient solution for the right use case (code should be stateless, etc). One of the main advantages of Azure Functions is the integrated local environment provided through Microsoft’s Visual Studio Code. You can test, debug, and deploy your function code all in one, well-designed interface. The goal for our function is to get the data from the files in blob storage, transform it, and send it to the messenger queue that feeds into the destination database.
Setting Up Azure Functions on VS Studio Code
If you don’t typically use VS Studio Code, then….well I apologize because this entire section operates under the assumption that you are developing on that IDE. I’m sure there’s other ways to do it, but this guide will not be showing those. This guide also assumes that you have an existing Azure account.
Setting up VS Studio Code is relatively easy. The first step is downloading the Azure Functions extension to your IDE (see below).
Once the function is installed, you should now see the Azure icon on your side menu (if you don’t see the icon, you may have to close and re-open the VS Studio Code application)
- What language do you want to use for the function project (Python)
- What function template (Blob Trigger)
- Level of Authorization (Function)
Once these are set, you should have an Azure Function project ready to edit on your VS Studio Code window with the following generated files
- hosts.json
- local.settings.json
- requirements.txt
- A folder that contains the function.json definition file and init.py file for the code
Blob Trigger
In our particular system, we needed our code to run whenever files are dropped into a specific directory. Since this is one of the most common use cases for the Azure Functions, the generated init.py comes with pre-configured code to begin the function. This code includes the pre-configured binding to the blob storage service. The code shown in this section will include some of the pre-configured bindings and some additional ones, which will require changes in various of the files in the projects.
import csv
import sys
import logging
from azure.storage.blob import BlobServiceClient
from azure.storage.blob import BlobClient
from azure.storage.blob import ContainerClient
import azure.functions as func
import pika
import os
import json
import pandas
from reader import Reader
from io import StringIO, BytesIO
import pyxlsb
import openpyxl
import requests
def main (myblob: func.InputStream, msg: func.Out[func.QueueMessage], inputblob: func.InputStream):
# dblob = myblob
logging.info(f"Python blob trigger function processed blob \n"
f"Name: {myblob.name}\n"
f"Blob Size: {myblob.length} bytes")`
In this initial section of the code, we import all the packages that we need to take the data from the files and send it to the queue. It’s important to note that all packages being imported into the function need to be reflected in the “requirements.txt” file
Each binding has certain values that reference the information in the “local.settings.json” file. For example, the field “connection” should reference a value in the “local.settings.json” that provides the connection URL value
Note: When deploying to production, all the values in the local.settings.json file need to be added as “Application Settings” to the Azure Function configuration in the Function App service
Once your bindings are set, you can now write the logic of the function code. While parts of the function we used in our system are either not relevant to the article or cannot be displayed because of client confidentiality, there are some things I want to highlight that can be useful for most general use cases.
name = myblob.name
print(name)
if ".csv" in name:
# # Convert blob to json
conn_str = os.environ['nameofstorageconnectionvariable']
container = os.environ["nameofcontainernamevariable"]
blob_name = myblob.name.split("/",1)[-1]
container_client = ContainerClient.from_connection_string( conn_str=conn_str,
container_name=container)
downloaded_blob = container_client.download_blob(blob_name)
df = pandas.read_csv(StringIO(downloaded_blob.content_as_text()), sep=',', engine="python")
The above lines of code are used to access the content of the file that was uploaded to blob storage and triggered this particular function. The connection string and storage container are stored as environment variables, and need to be set to access the storage service. This produces a container client, which has a method to download the blob object itself. It’s important to note that the blob name should be formatted (I used split), in order to use it to download the blob. If the blob name is not formatted, it can throw an error when trying to use that name to download the blob.
In this use case, the next step in the pipeline is a message queue. To insert the contents of the blob file into the queue, the Azure function needed to transform the downloaded content into JSON. This requires first using the Pandas package to create a dataframe from the blob csv file.
Since I knew the file was going to be a csv, I called the read_csv method. If you’re handling excel files or something similar, pandas has methods that work in the same manner as read_csv. From this dataframe, the function then iterates through the rows and creates batches due to the large data size of certain data entity files. These batches are then transformed into JSON. The final condition determines the contents of the message being sent to the quee based on the file name. Once the JSON is created from the raw file data, it is then dumped into a variable that is sent to the message queue.
df = pandas.read_csv(StringIO(downloaded_blob.content_as_text()), sep=',', engine="python")
index = df.index
rowamount = len(index-1)
print("Here is the rows count ---------------->", rowamount)
batchdelimeter = 5000
line = 0
x = 1
if batchdelimeter != 1:
batchcounter = rowamount//batchdelimeter
if(rowamount%batchdelimeter) !=0:
batchcounter = batchcounter + 1
else:
batchcounter = rowamount
x = 0
print("here is the batch count--------->", batchcounter)
for batch in range(batchcounter):
if (batch==batchcounter):
iter=rowamount
else:
iter=(x*batchdelimeter)
x= x+1
print("starting with the batch # ---------------->", batch)
print("the line------->", line)
print("the iterator------>", iter)
print("the loc", df.loc[line:iter])
linerecord = df.loc[line:iter]
print("ending with the batch # ---------------->", batch )
line=iter+1
lastflag = False
if batch == (batchcounter - 1):
lastflag = True
# for line in range(batch):
result = linerecord.to_json(orient='records')
parsed = json.loads(result)
dumpresults = json.dumps(parsed, indent=4)
messagebatchcounter = batchcounter
stringcount = str(messagebatchcounter)
if "FILENAMECONDITION" in name:
msg = '{ INSERT JSON HERE }'
key = "vendor"
r = requests.post(api_url, data=msg)
Our system sent the variable storing the JSON content to the message queue by calling a post method on an API that we developed in-house.
Conclusion
The bulk of this data pipeline lies in “the middleware” of the system. The Azure Logic App and Functions serverless service combined offer quite a lot of functionality and power across the Azure cloud ecosystem. Being able to integrate workflows across services and have them communicate with one another is a key advantage in the logic apps. On the other hand, the Azure functions provide a level of compute resource granularity that is hard to beat. While the functions service supports a variety of language, the handlers are configured to handle C#, Java, JavaScript, PowerShell, Python, and TypeScript natively. I highly recommend utilizing the VS Studio Code extension for the functions service, as its fully integrated IDE is convenient for local development and testing, and allows you to upload your code to the functions app on the cloud very easily. The next and final part of this case study will break down what happens after the files are sent to storage and the content transformed to JSON.
The Destination
In the past articles in this case study, we went over the source systems and the middleware that comprise the data pipeline. Now we’ll discuss the destination components and how they communicate with the other parts to make up the end-to-end pipeline and complete the event-driven design. These components are the message broker, the consumer service, and the destination database (MongoDB).
Message Queues & Brokers
Message queues have been defined as “a form of asynchronous service-to-service communication used in serverless and microservices architecture”. In less buzz wordy terms, it’s a software component that acts as a hub for messages from a source (also known as a producer) to a destination (also known as a consumer). Instead of one system sending data directly to another, this acts as a middle man of sorts. This “decoupling” of software components is a core part of the modern system design for cloud based software and applications. Something to note is the concept of asynchronous communication, which is really any sort of communication that includes sending someone a message and not expecting an immediate response.
While there are different variations of queues and how they handle messages (first in, first out as an example), for this particular guide we’ll talk about RabbitMQ. RabbitMQ, or just Rabbit, is an open-source message broker. A message broker is a variation of the concept of a message queue, still acting as a middle-man in the transfer of messages, but including capabilities like parallel processing from multiple consumers, transformation of the data/messages. It can help translate between different messaging protocols, as opposed to just sending it back and forth with no manipulation.
Due to its open-source nature, you can use RabbitMQ locally and on the cloud without having to pay for anything other than compute resources to host on the cloud. Rabbit can be deployed using Docker, Kubernetes, or just by downloading it on your machine, (https://www.rabbitmq.com/download.html). A popular alternative is Apache Kafka, which has its own pros and cons, and can also be deployed using Docker or by installing it locally. Kafka is usually compared to a queuing system such as RabbitMQ. What makes the difference is that after consuming the log, Kafka doesn’t delete it. In that way, messages stay in Kafka longer, and they can be replayed. Rabbit uses a pub/sub pattern, with consumers “subscribing” to a particular topic and Rabbit “pushing” the information to the consumers.
Consumer & Destination Database
The queue needs somewhere to send the message that it receives. This is where the consumer comes in. A consumer is any piece of software that communicates with the queue or the broker, and does something with the data that it receives. Typically a micro-service, this software can be written in your preferred language, although in our case we wrote it in Go.
Our solution concluded with a microservice written in Go that acted as a consumer, cleaned the data up, and upserted into a MongoDB cluster. I’ve included some snippets from the consumer we developed to help demonstrate the basic parts of this part of the system (connect to the queue, get the message data, and finally send it to the database). It should be noted that our production code was different due to the unique data manipulation that the client needed and the amount of messages we needed to handle.
It’s also worthwhile to mention my assumption as a writer that the reader knows the basics of Go so I won’t spend time talking too much about the intricacies of the language and the development environment (that is a different post entirely).
package main
import (
"encoding/json"
"fmt"
"io"
"log"
"net"
"time"
"github.com/streadway/amqp"
)
func main() {
fmt.Println("Connecting to RabbitMQ")
url := "RABBIT-URL-GOES-HERE"
connection, err := amqp.Dial(url)
if err != nil {
fmt.Println("Error connecting with dial: ", err)
}
defer connection.Close()
channel, err := connection.Channel()
if err != nil {
fmt.Println("Could not create channel from rabbit connection: ", err)
}
defer channel.Close()
queueName := "QUEUE-NAME-GOES-HERE"
// The variable m is used here to declare the type of rabbitmq we are using. This is a solution to the error, "inequivalent arg 'x-queue-type' for queue 'queuename' in vhost '/': received none but current is the value 'classic' of type 'longstr"
m := make(amqp.Table)
m["x-queue-type"] = "classic"
q, err := channel.QueueDeclare(
queueName, //name
true, //durable
false, //deleted when unused
false, // exclusive
false, //no-wait
m, //arguments
)
if err != nil {
fmt.Println("Error declaring queue: ", err)
}
msgs, err := channel.Consume(
q.Name, //queue
"", //consumer
true, //auto-ack
false, //exclusive
false, //no-local
false, //no-wait
nil, //args
)
}
In this initial part of the code, we’re using the amqp package to connect to the queue and consume the messages in it. Once consumed, the information is stored in the msgs variable (type <-chan amqp.Delivery) that is returned by the Consume method.
package main
import (
"context"
"encoding/json"
"fmt"
"strconv"
"time"
"go.mongodb.org/mongo-driver/bson"
"go.mongodb.org/mongo-driver/bson/primitive"
"go.mongodb.org/mongo-driver/mongo"
"go.mongodb.org/mongo-driver/mongo/options"
)
type Message struct {
Name string json:"Name" bson:"Name"
Value string json:"Value" bson:"Value"
}
var db *mongo.Client
var CRUDdb *mongo.Collection
var mongoCTX context.Context
func main() {
msgs, err := channel.Consume(
q.Name, //queue
"", //consumer
true, //auto-ack
false, //exclusive
false, //no-local
false, //no-wait
nil, //args
)
/////code block from above
//connecting to MongoDB
fmt.Println("connecting to MongoDB......")
mongoCTX = context.Background()
db, err = mongo.Connect(mongoCTX, options.Client().ApplyURI("DB-URI-GOESS-HERE"))
if err != nil {
fmt.Println("Failed with applying URI", err)
log.Fatal(err)
}
err = db.Ping(mongoCTX, nil)
if err != nil {
fmt.Println("Failed to connect to db", err)
log.Fatal(err)
} else {
fmt.Println("Connected to mongo")
}
CRUDdb = db.Database("DB-NAME-GOES-HERE").Collection("COLLECTION-NAME-GOES-HERE")
// starting a go func to handle the range of messages efficiently
go func() {
for d := range msgs {
msgCount++
var messagestruct Message
fmt.Printf("\nMessage Count: %d, Message Body: %s\n", msgCount, d.Body)
//here we're essentially "mapping" (unmarshaling) the content of the message to the struct we declared above
err := json.Unmarshal(d.Body, &messagestruct)
if err != nil {
fmt.Println("Error unmarshaling message body to message struct", err)
}
result, err := CRUDdb.InsertOne(ctx, messagestruct)
if err != nil {
fmt.Println("Error Inserting Document ----> ", err)
}
fmt.Println("Here is the create result ", result)
}
}()
}
In this second block of code, we’re connecting to the Mongo database instance and giving it a ping just to make sure we connected successfully. Then, we enter into a go routine to handle the messages using threads in case there’s a large amount of data in the queue (see multi-threading if you need more info around the concept). In this go routine, we unmarshal the body of the message into our struct so that it can be represented in both JSON and BSON (need this data representation in order to insert into the database).
For context, MongoDB is a document based database (see NoSQL) that manages data not in tables or rows, but in essentially JSON-based format (i.e. BSON). Data is represented as key/value pairs, and is inherently more flexible than traditional SQL databases due to its lack of an enforced schema. It is important to note that in production, we utilized the upsert capability of MongoDB, which inserts data only if the database doesn’t find that the document already exists in the records. We used upsert because our production system is moving changed data, so we want to make sure that we only update the documents that have changed.
Conclusion
Working on this particular project was exciting due to the many different services and software we implemented. From working on serverless functions to document based databases, this pipeline had a bit of everything (and it also optimized for cost & performance, which is the goal at the end of the day). I’ve included a visual of the entire system from beginning to end and its components, which I also included in the original post of this series, way back when. If you read this whole thing, I appreciate it and I hope you got something useful out of it. If neither of those things are true, then that’s okay too.