WHAT IS THIS
First, the model
Download Ollama (https://ollama.ai/download)
Choose a model (Llama 2, Llama 2 uncensored, or even a variant) NOTE: Be conscious of your machine's capabilites and the models spec requirements i.e. the 7b model generally requires at least 8GB of RAM, etc
A) Interact on the CLI directly by running "ollama run llama2" in your terminal
OR
B) Call it like you would an API in your app or program (you will see how I did it further below)
Second, the database (and the data I guess)
If you're interested in learning about this component in more details, I highly recommend the following resources:
Vicki Boykis' "What are embeddings" book, https://vickiboykis.com/what_are_embeddings/about.html.
Prashanth Rao's "Vector Databases" series, https://thedataquarry.com/posts/vector-db-1/
With that said, assuming you have Docker itself already set up, here's how to get Qdrant up locally:
Run
'docker pull qdrant/qdrant’in your terminalThen, run
'docker run -p 6333:6333 \-v $(pwd)/qdrant_storage:/qdrant/storage:z \qdrant/qdrant'
You should now be able to see the db UI at localhost:6333/dashboard and you'll be interfacing with it programatically at localhost:6333
Third, the thing
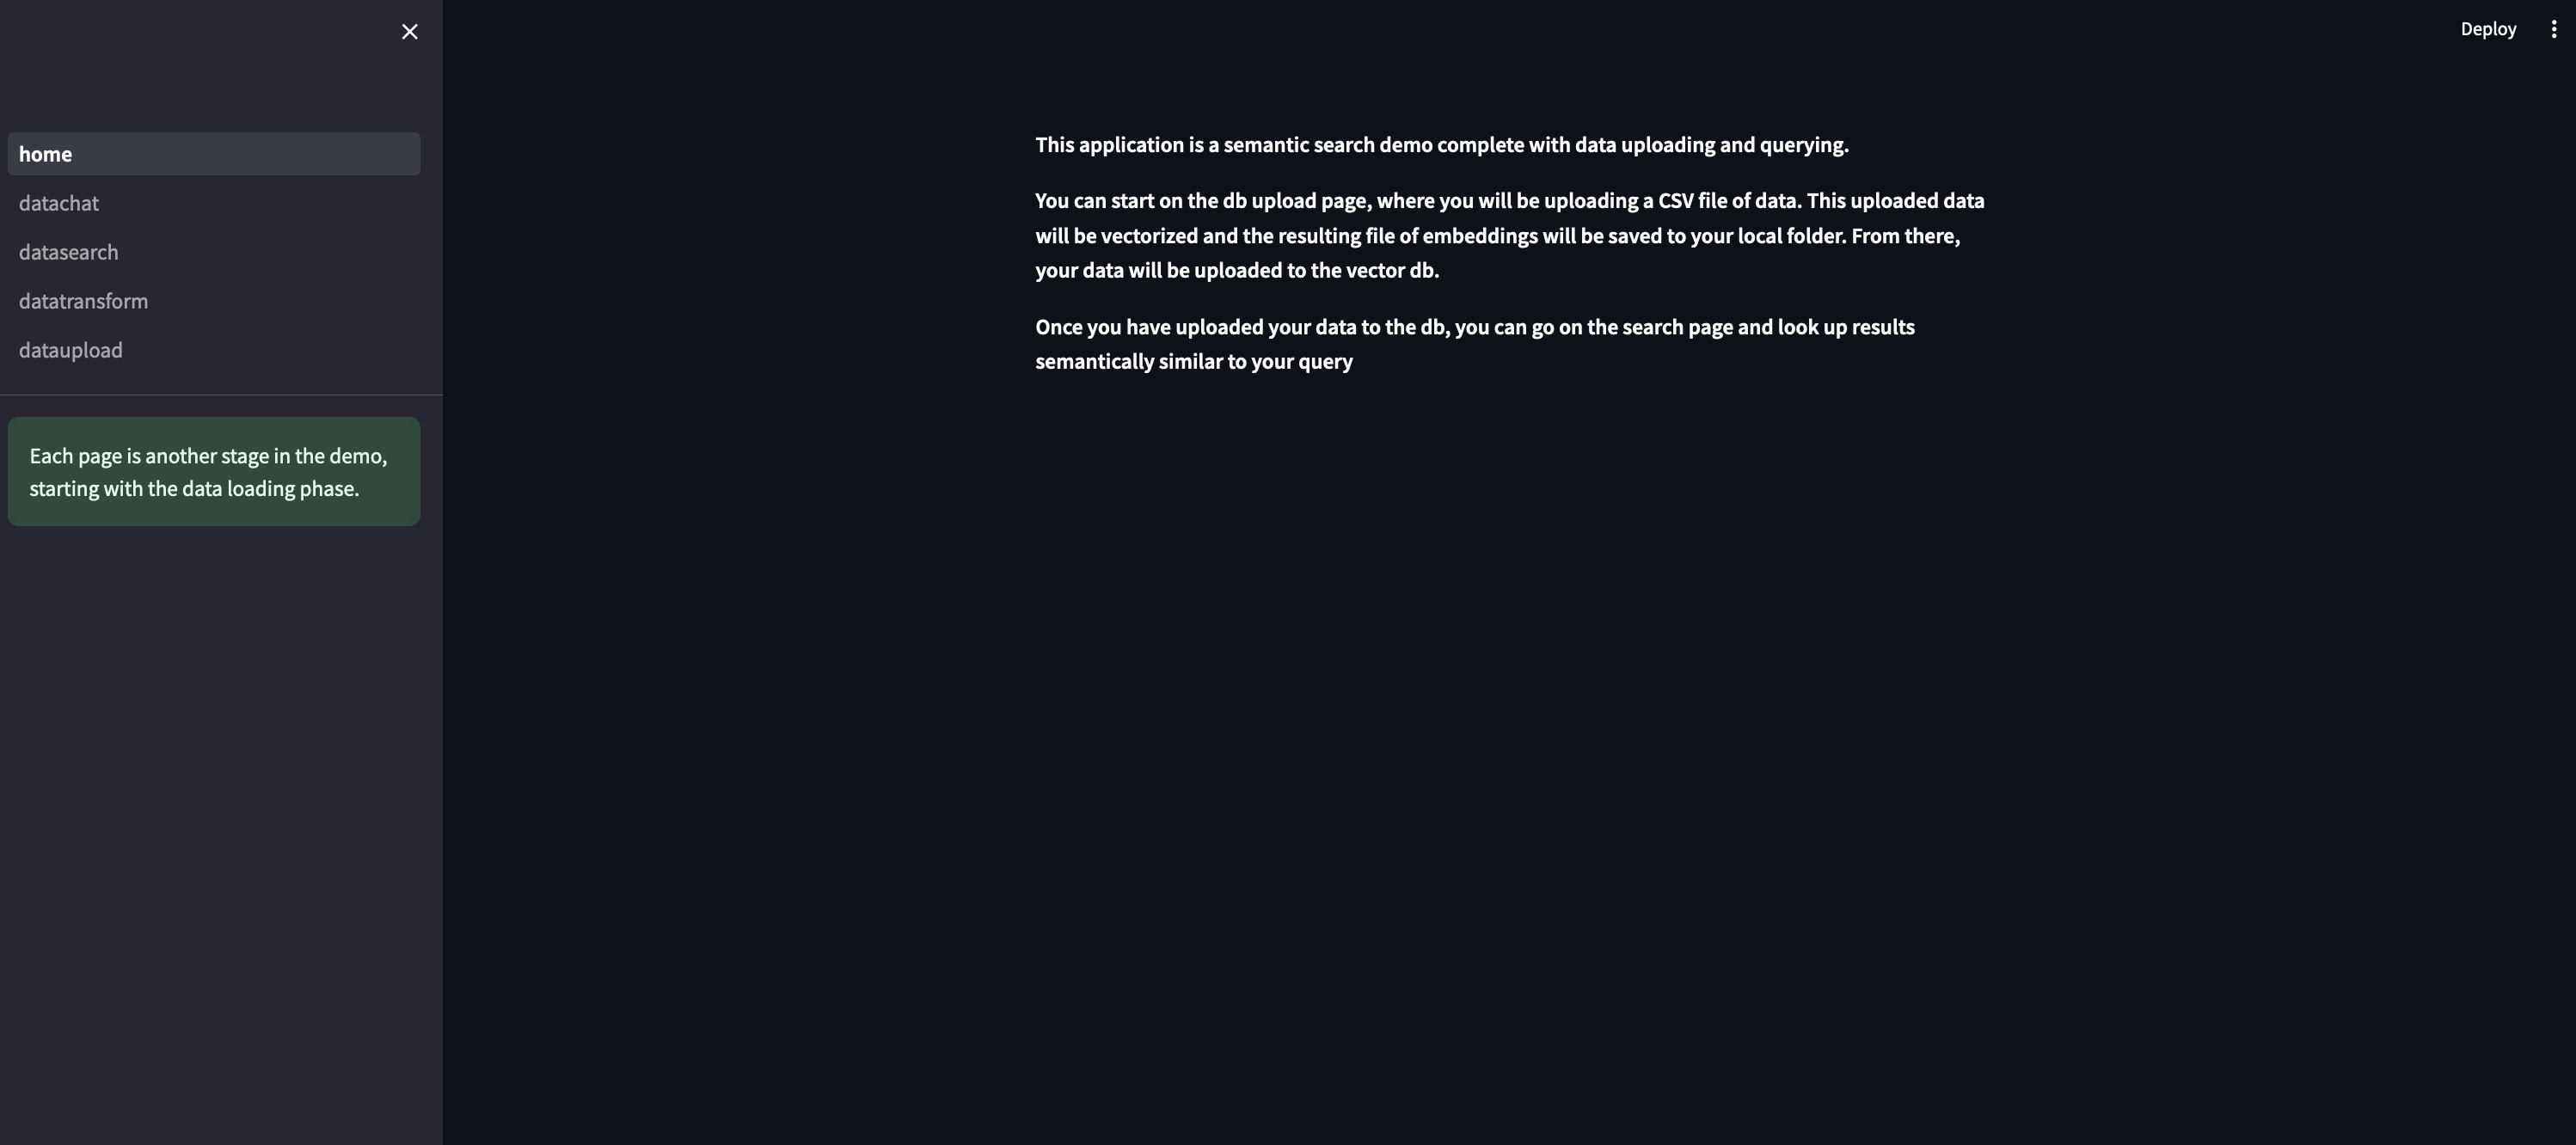
import streamlit as st


st.set_page_config(
    page_title="Home Page & Data Loading"
)

st.sidebar.success("Each page is another stage in the demo, starting with the data loading phase.")

st.markdown(
    """
This application is a semantic search demo complete with data uploading and querying.


You can start on the db upload page, where you will be uploading a CSV file of data.
This uploaded data will be vectorized and the resulting file of embeddings will be saved to your local folder.
From there, your data will be uploaded to the vector db.

Once you have uploaded your data to the db, you can go on the search page and look up results semantically similar to your query
"""
)
import streamlit as st
from functions import calculate_embeddings, clean_textfiled
from sentence_transformers import SentenceTransformer
from tqdm import tqdm
from qdrant_client.http import models as rest
import pandas as pd
from qdrant_client import QdrantClient, models
import json

import numpy as np

st.set_page_config(
    page_title="Data Transformed"
)


st.markdown(
"""
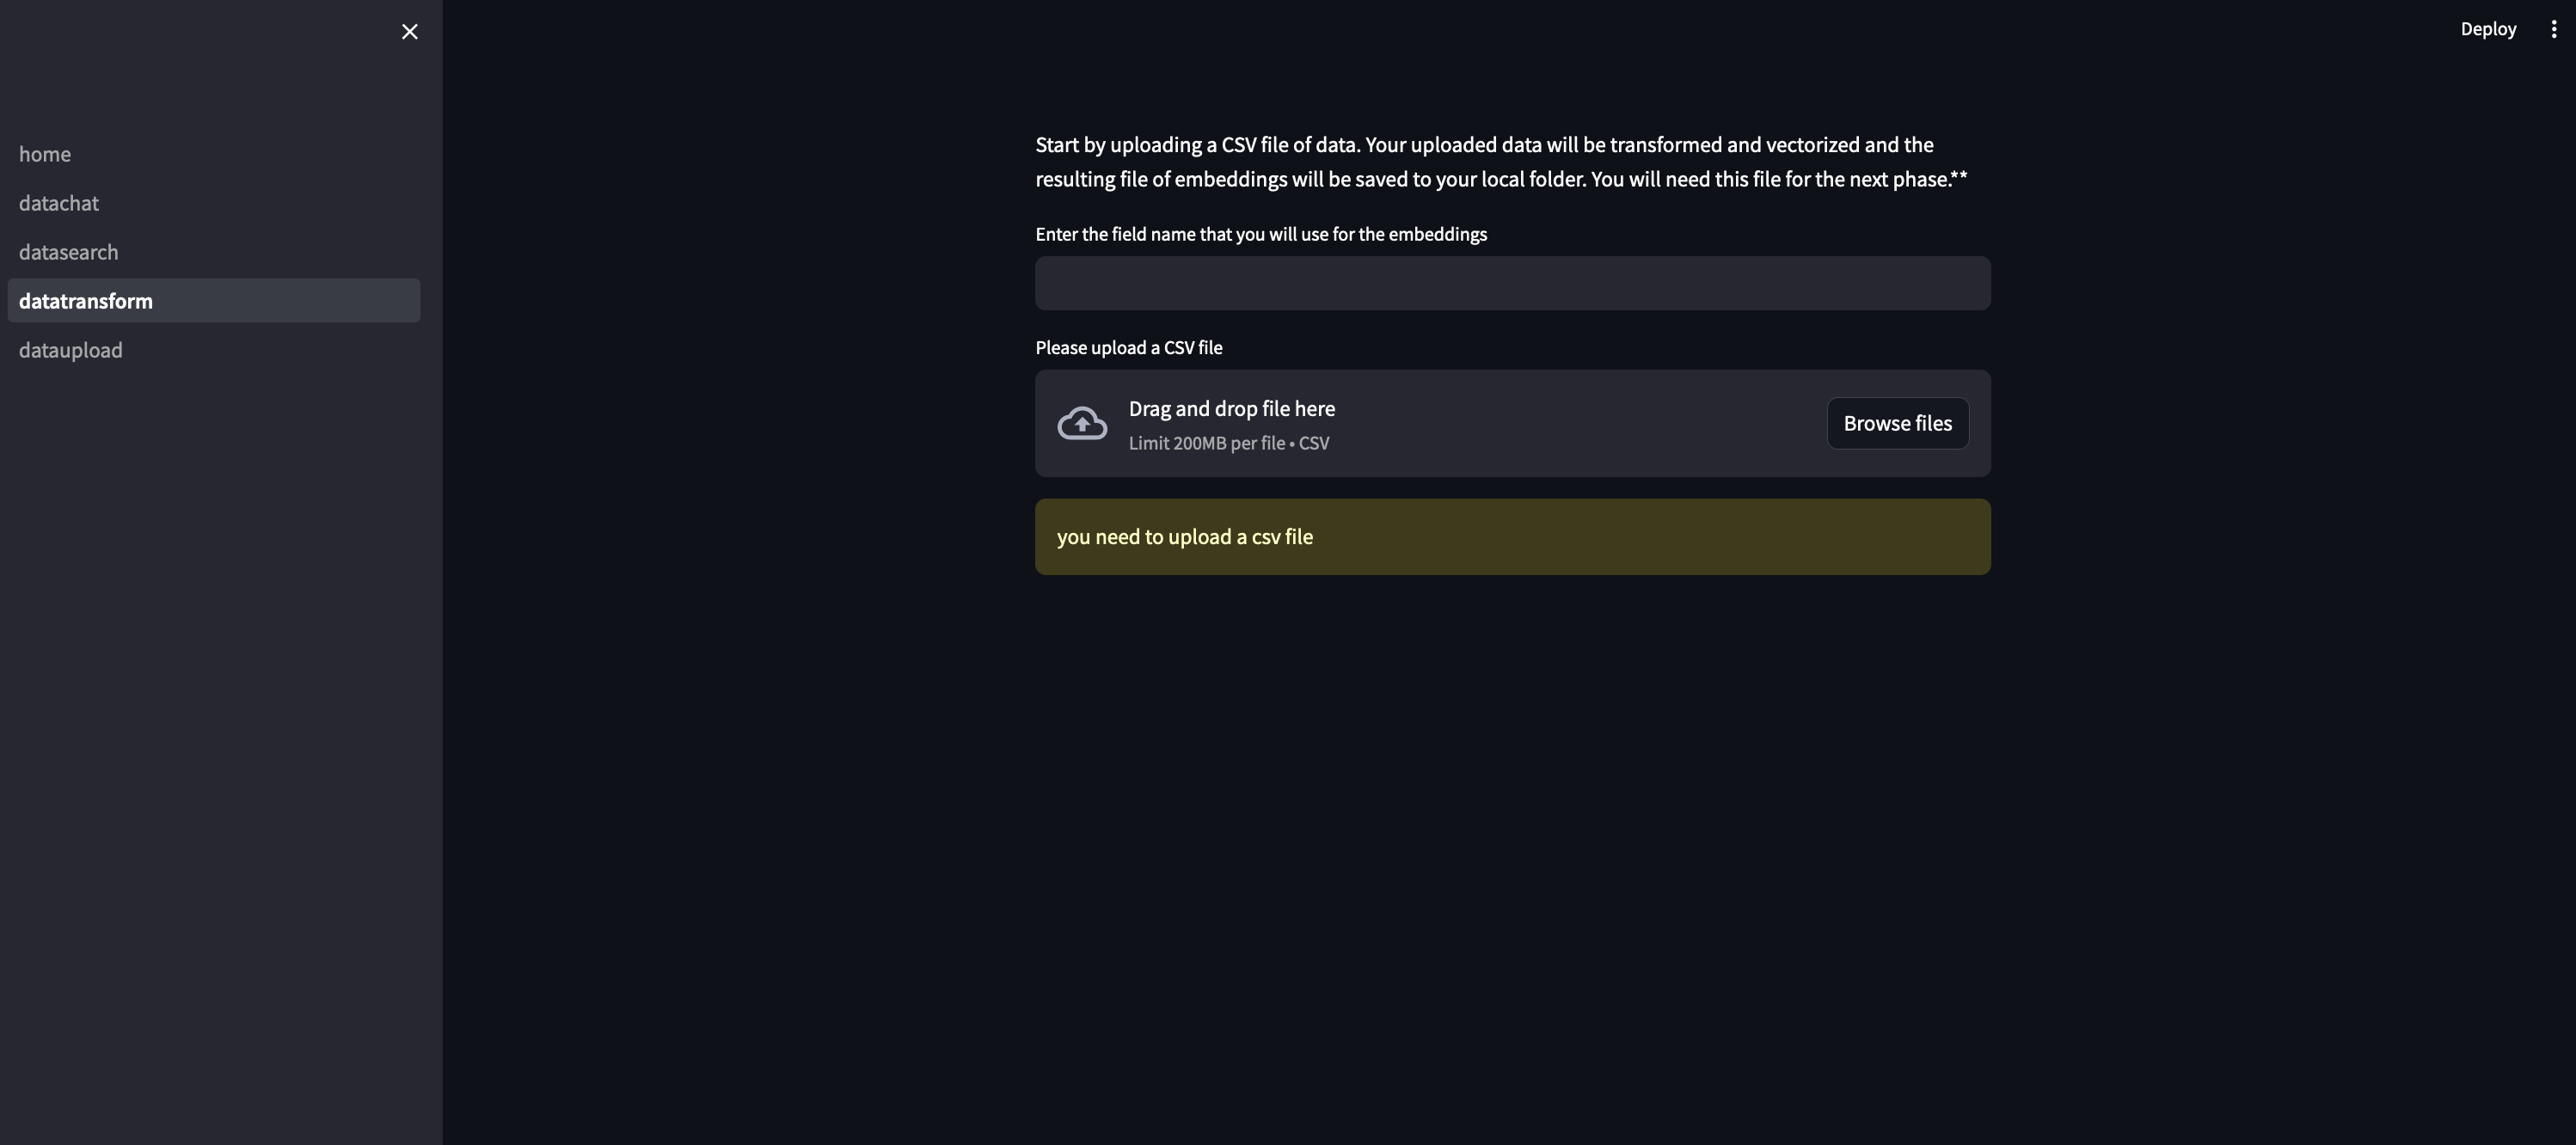
Start by uploading a CSV file of data. Your uploaded data will be transformed
and vectorized and the resulting file of embeddings will be saved to your local folder.
You will need this file for the next phase.**
"""
)

TEXT_FIELD_NAME = st.text_input("Enter the field name that you will use for the embeddings")
data_file = st.file_uploader("Please upload a CSV file", type="csv")
if data_file is not None:
    df = pd.read_csv(data_file)
    df = clean_textfiled(df, TEXT_FIELD_NAME)
    # vectors file will save to your local folder
    npy_file_path = data_file.name

    # Load the SentenceTransformer model
    model = SentenceTransformer('all-MiniLM-L6-v2')


    # # Split the data into chunks to save RAM
    batch_size = 1000
    num_chunks = len(df) // batch_size + 1

    embeddings_list = []

    # Iterate over chunks and calculate embeddings
    for i in tqdm(range(num_chunks), desc="Calculating Embeddings"):
        start_idx = i * batch_size
        end_idx = (i + 1) * batch_size
        batch_texts = df[TEXT_FIELD_NAME].iloc[start_idx:end_idx].tolist()
        batch_embeddings = calculate_embeddings(batch_texts, model)
        embeddings_list.extend(batch_embeddings)

    # Convert embeddings list to a numpy array
    embeddings_array = np.array(embeddings_list)

    # Save the embeddings to an NPY file
    np.save(npy_file_path, embeddings_array)

    print(f"Embeddings saved to {npy_file_path}")


else:
    st.warning("you need to upload a csv file")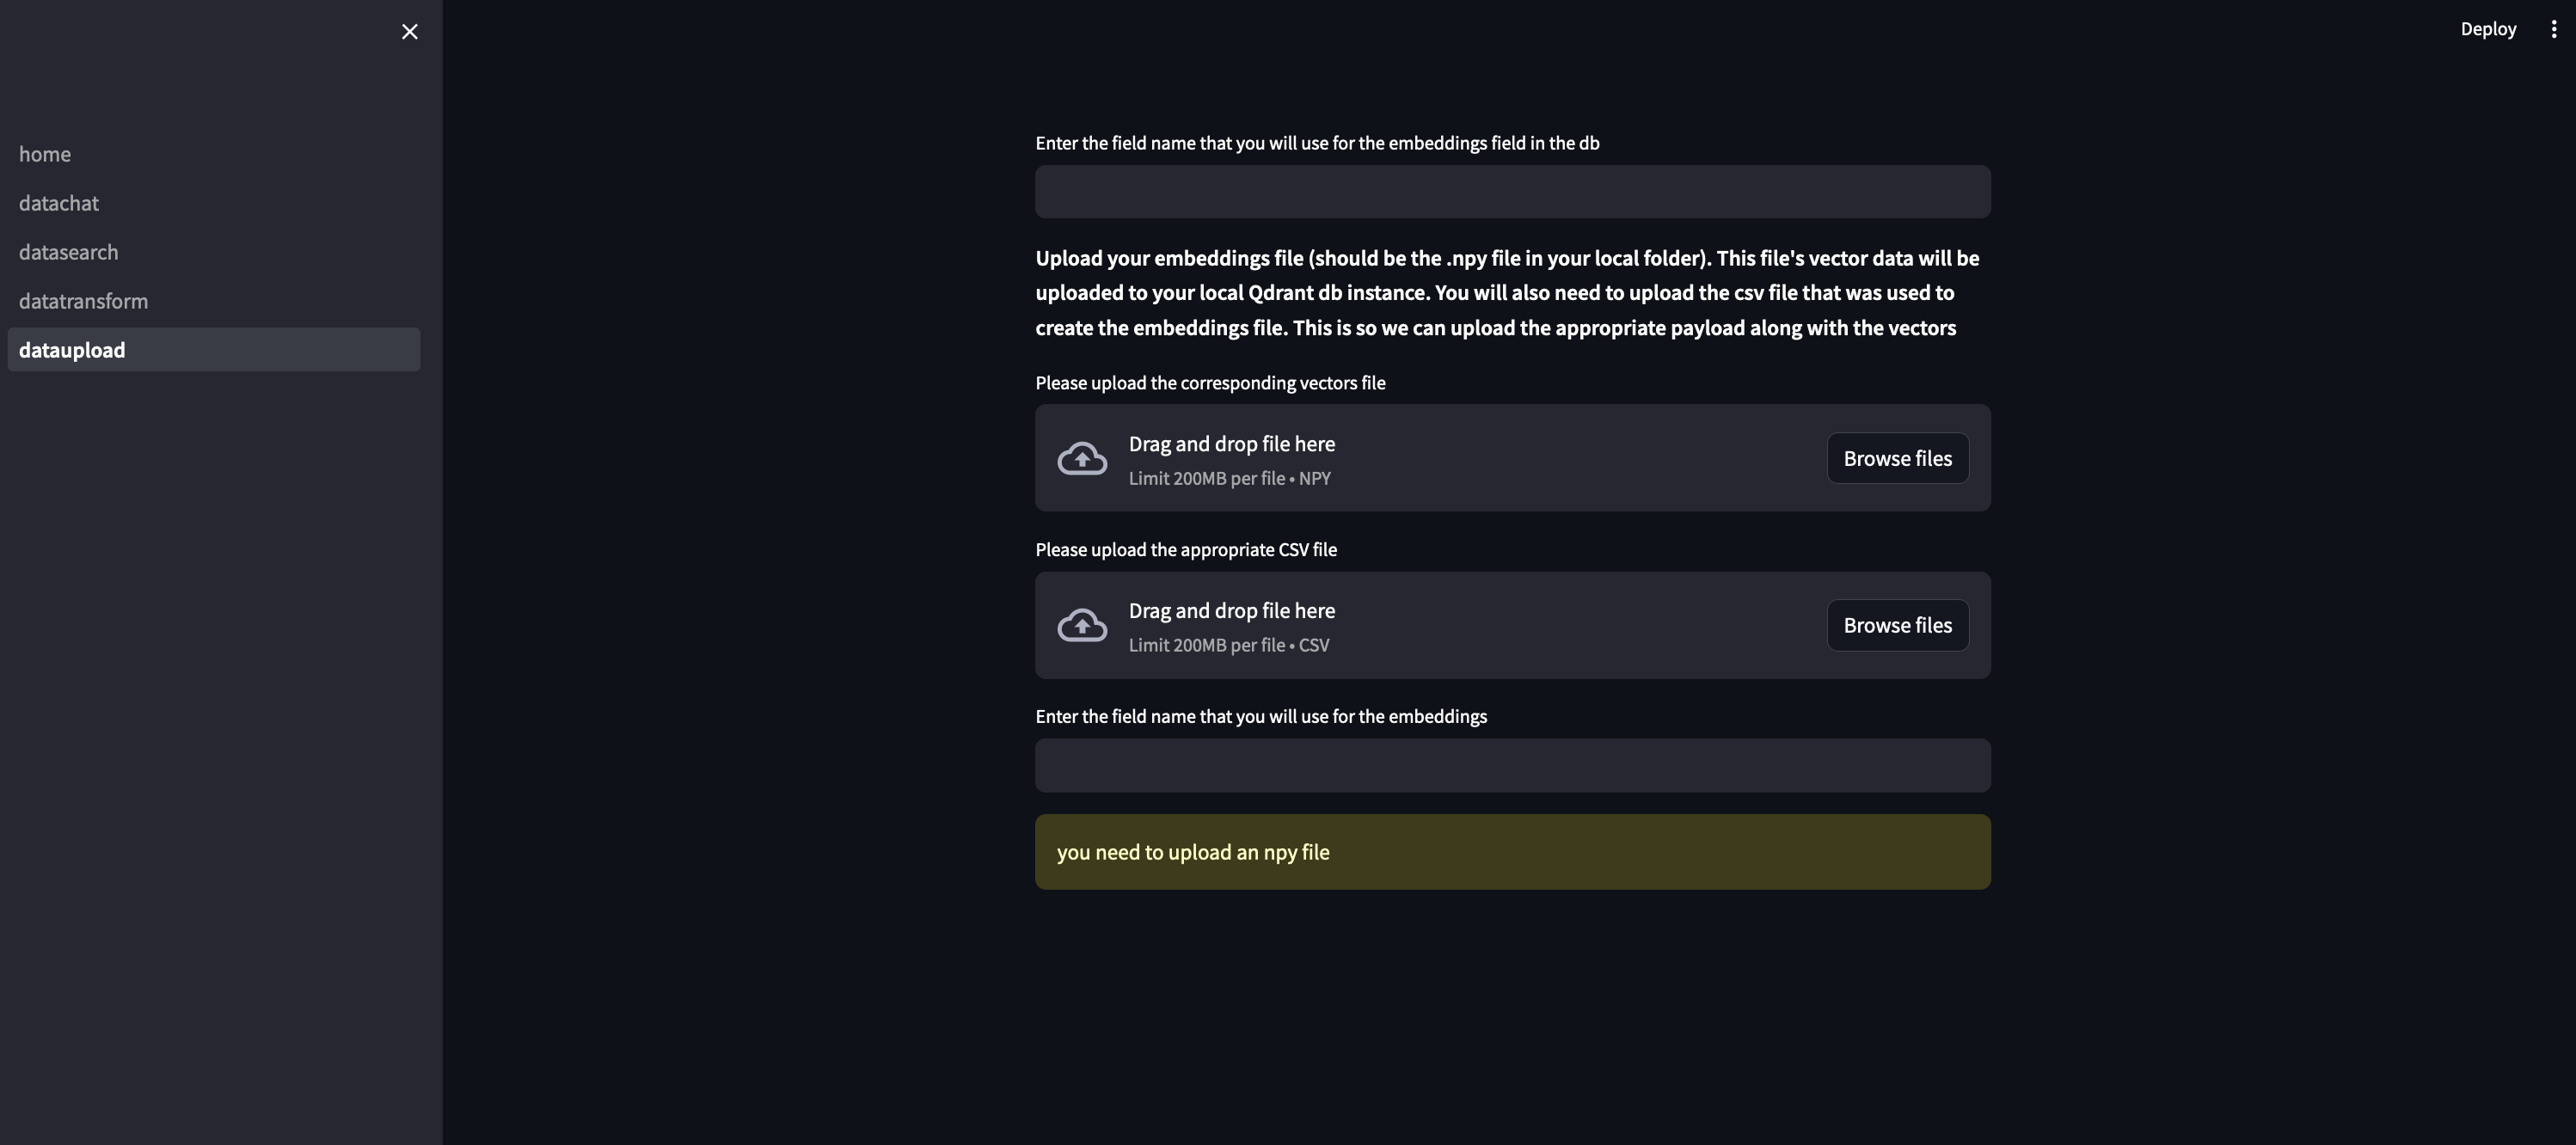
import streamlit as st
from functions import calculate_embeddings, clean_textfiled
from sentence_transformers import SentenceTransformer
from tqdm import tqdm
from qdrant_client.http import models as rest
import pandas as pd
from qdrant_client import QdrantClient, models
import json

import numpy as np

st.set_page_config(
    page_title="Data Upload to DB"
)

VECTOR_FIELD_NAME = st.text_input("Enter the field name that you will use for the embeddings field in the db")


st.markdown(
    """
   **Upload your embeddings file (should be the .npy file in your local folder). This file's vector data will be uploaded to your local Qdrant db instance.**
   **You will also need to upload the csv file that was used to create the embeddings file. This is so we can upload the appropriate payload along with the vectors**
    """
    )
embed_data_file = st.file_uploader("Please upload the corresponding vectors file", type="npy")
data_file = st.file_uploader("Please upload the appropriate CSV file", type="csv")
TEXT_FIELD_NAME = st.text_input("Enter the field name that you will use for the embeddings")
if embed_data_file is not None and data_file is not None:
    client = QdrantClient('http://localhost:6333')
    df = pd.read_csv(data_file)
    df = clean_textfiled(df, TEXT_FIELD_NAME)
    payload = df.to_json(orient='records')
    payload = json.loads(payload)
    vectors = np.load(embed_data_file)
    client.recreate_collection(
    collection_name="amazon-products",
    vectors_config={
        VECTOR_FIELD_NAME: models.VectorParams(
            size=384,
            distance=models.Distance.COSINE,
            on_disk=True,
        )
    },
    # Quantization is optional, but it can significantly reduce the memory usage
    quantization_config=models.ScalarQuantization(
        scalar=models.ScalarQuantizationConfig(
            type=models.ScalarType.INT8,
            quantile=0.99,
            always_ram=True
        )
    )
)
    client.upload_collection(
    collection_name="amazon-products",
    vectors={
        VECTOR_FIELD_NAME: vectors
    },
    payload=payload,
    ids=None,  # Vector ids will be assigned automatically
    batch_size=256  # How many vectors will be uploaded in a single request?
)


else:
    st.warning("you need to upload an npy file")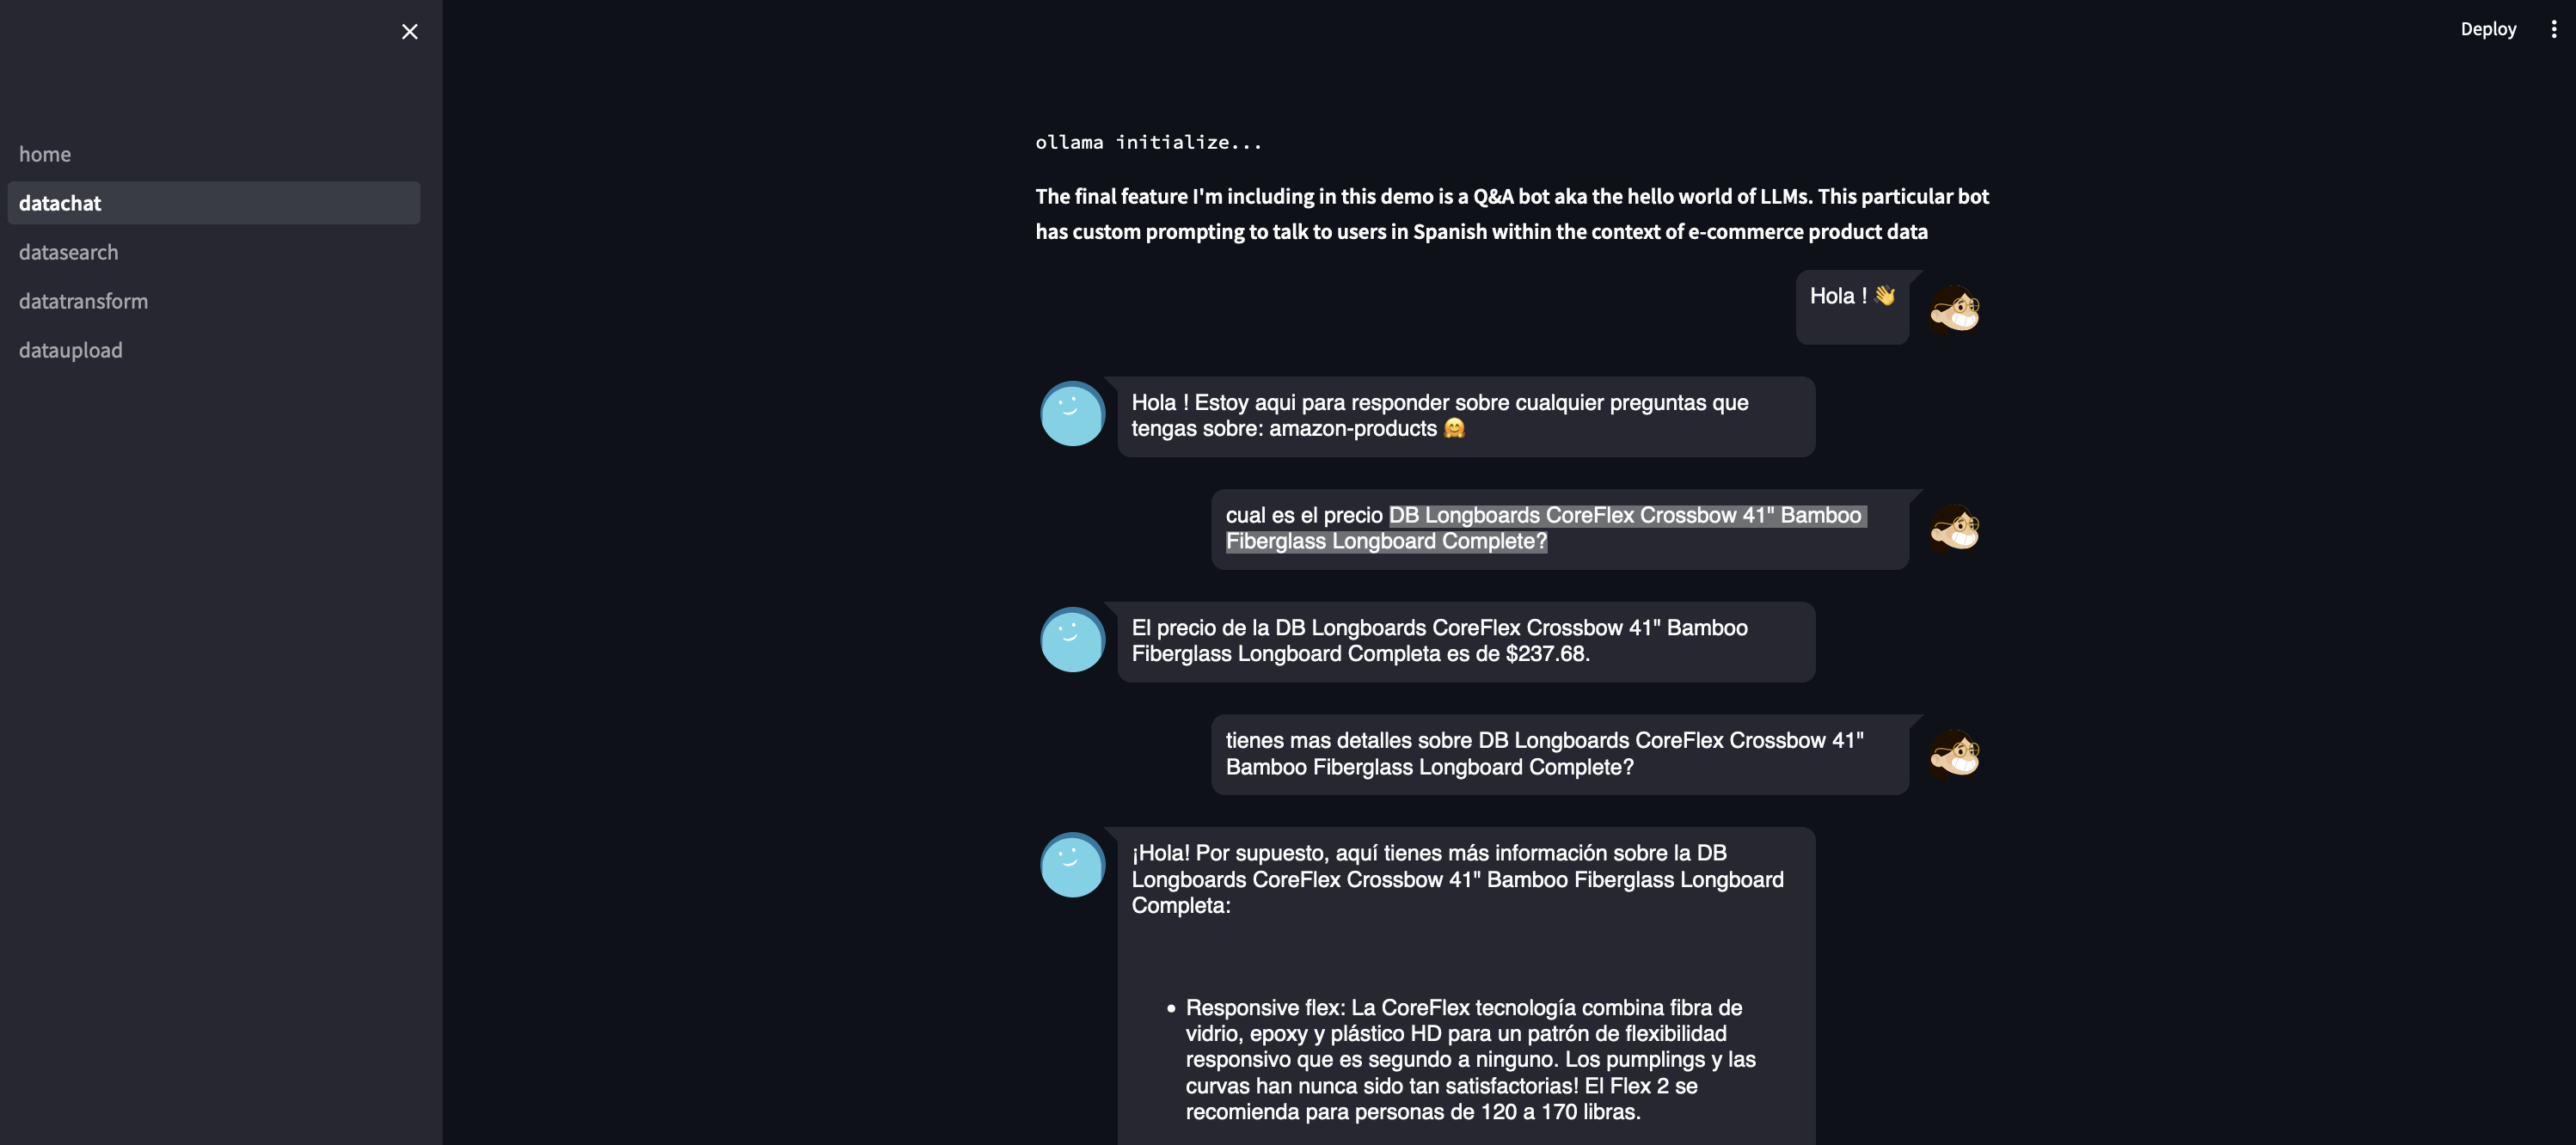
from sentence_transformers import SentenceTransformer
from qdrant_client import QdrantClient
import streamlit as st
from langchain.llms import Ollama


from langchain.llms import Ollama
from qdrant_client import QdrantClient
from sentence_transformers import SentenceTransformer


# from functions import conversational_chat
from streamlit_chat import message
from langchain.vectorstores import Qdrant
from qdrant_client.http import models as qdrant_models


st.set_page_config(
    page_title="Data Chat"
)


st.text("ollama initialize...")
ollama = Ollama(base_url='http://localhost:11434',
model="llama2")


st.markdown(
"""
**The final feature I'm including in this demo is a Q&A bot aka the hello world of LLMs. This particular bot has custom prompting to talk to users in Spanish within the context of e-commerce product data**
"""
)
# search qdrant
collection_name = "amazon-products"

client = QdrantClient('http://localhost:6333')
# Initialize encoder model
model = SentenceTransformer('all-MiniLM-L6-v2')


if 'history' not in st.session_state:
    st.session_state['history'] = []

if 'generated' not in st.session_state:
    st.session_state['generated'] = ["Hola ! Estoy aqui para responder sobre cualquier preguntas que tengas sobre:  " + collection_name + " 🤗"]

if 'past' not in st.session_state:
    st.session_state['past'] = ["Hola ! 👋"]


def conversational_chat(query):
    vector = model.encode(query).tolist()
    hits = client.search(
    collection_name="amazon-products",
    query_vector=vector,
    limit=3
)
# the payload that comes back from the db has a lot of extra data so at this point we are cleaning it up to reduce the noise and help the model focus on the important bits.
# These fields can change depending on what we deem as relevant data
    toplevelkeys = ['Product 1','Product 2','Product 3','Product 4','Product 5']
    context = {'Product 1': [], 'Product 2': [], 'Product 3': [],  'Product 4': [], 'Product 5': []}
    for hit in hits:
        key1 = "Price"
        key2 = "About Product"
        key3 = "Product Name"
        key4 = "Product Specification"
        val1 = hit.payload["Selling Price"]
        val2 = hit.payload["About Product"]
        val3 = hit.payload["Product Name"]
        val4 = hit.payload["Product Specification"]
        for i in toplevelkeys:
            hitinstance = {key1:val1,key2:val2,key3:val3,key4:val4}
            context[i].append(hitinstance)
    input_prompt = f"""[INST] <<SYS>>
    You are a customer service agent for a latin american e-commerce store. As such you must always respond in the Spanish language. Using the search results for context: {context}, do your best to answer any customer questions. If you do not have enough data to reply, make sure to tell the user that they should contact a salesperson. Everytime you don't reply in Spanish, you will be punished
    <</SYS>>

    {query} [/INST]"""
    output = ollama(input_prompt)
    return output

#container for the chat history
response_container = st.container()
#container for the user's text input
container = st.container()

with container:
    with st.form(key='my_form', clear_on_submit=True):

        user_input = st.text_input("Query:", placeholder="Puedes hablar sobre los productos de la tienda de e-commerce aqui (:", key='input')
        submit_button = st.form_submit_button(label='Send')

    if submit_button and user_input:
        output = conversational_chat(user_input)

        st.session_state['past'].append(user_input)
        st.session_state['generated'].append(output)

if st.session_state['generated']:
    with response_container:
        for i in range(len(st.session_state['generated'])):
            message(st.session_state["past"][i], is_user=True, key=str(i) + '_user', avatar_style="big-smile")
message(st.session_state["generated"][i], key=str(i), avatar_style="thumbs")import streamlit as st
from typing import List
# Define a function to calculate embeddings
def calculate_embeddings(texts, model):
embeddings = model.encode(texts, show_progress_bar=False)
return embeddings
#define a function to clean up data
def clean_textfiled(df, TEXT_FIELD_NAME):
# Handle missing or non-string values in the TEXT_FIELD_NAME column
df[TEXT_FIELD_NAME] = df[TEXT_FIELD_NAME].fillna('') # Replace NaN with empty string
df[TEXT_FIELD_NAME] = df[TEXT_FIELD_NAME].astype(str) # Ensure all values are strings
df[TEXT_FIELD_NAME] = df[TEXT_FIELD_NAME].map(lambda x: x.lstrip('Make sure this fits by entering your model number. |').rstrip('aAbBcC'))
return dfConclusion
Things to extend:
- As you may have noticed, this entire project is built to run locally. So the next step would be to take this to a production type of config
- Qdrant does offer some more enterprisy deployment options, including Qdrant Cloud (https://qdrant.tech/documentation/cloud/), a SaaS version that gives you a managed instance of the db basically (note: I have not gone past reading their docs on this product so not sure how it performs. proceed accordingly)
- Ollama allowed us to run these open sourced models locally. this obviously does not work at any sort of scale. With that in mind, HuggingFace has offerings around open source models like Llama 2 + AWS BedRock and equivalent offerings at the hyperscalers also have Llama 2 options for deployment (note: again I have not gotten past the reading docs stage for these services so I can't speak too much about how good they are in reality)

